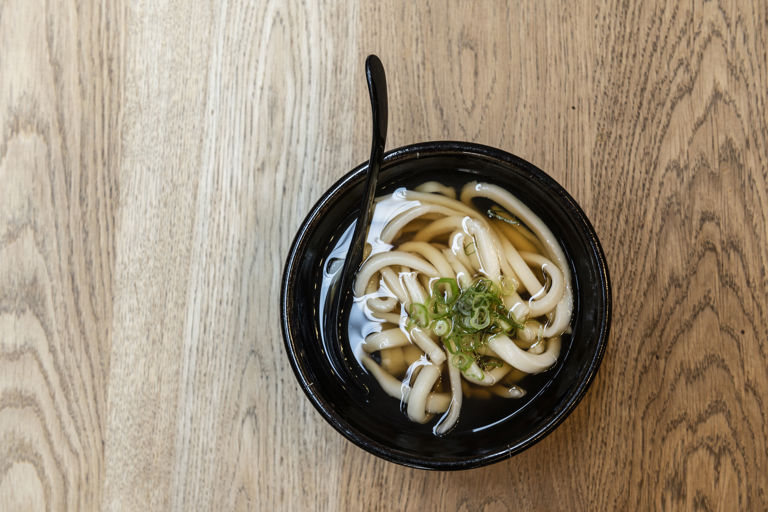
Homemade udon noodles in dashi
by Shuko Oda

- medium
- 4
- 1 hour 20 minutes
★ ★ ★ ★ ★
Not yet rated
Japanese udon noodles are bouncy, slippery, delicious things, and taking the time to make them from scratch at home offers something far, far superior to the ready-made stuff in shops. Chef (and udon specialist) Shuko Oda shares her own recipe for traditional udon noodles, served in a simple homemade dashi broth.
Watch our other video masterclasses by heading over to our collection of Signature Series recipes.
discover more:
Related Recipes
Ingredients
Metric
Imperial
Udon
- 540g of strong white flour, plus extra for dusting
- 60g of tapioca flour
- 300ml of water
- 38g of salt
Dashi
- 1.5l water
- 15g of kombu
- 15g of bonito flakes
- 24g of usukuchi soy sauce, (Japanese light soy sauce)
- 12g of mirin
- 15g of caster sugar
- 10g of salt
- 1 bunch of spring onions, finely sliced, to garnish
SAVE RECIPE
Method
1
The day before you plan to serve, soak the dried kombu in the water and place in the fridge overnight to infuse
- 15g of kombu
- 1.5l water
2
The next day, remove the kombu and bring the water to the boil. Add the bonito, turn off the heat and then strain the dashi into a clean pan. Cover and set aside in the fridge while you make the udon
- 15g of bonito flakes
3
To make the udon, combine the water and salt and mix until completely dissolved. The amount of salt listed here is a good starting point, but you can play around with the amount – the more salt, the tougher the dough is, and as a general rule you increase the amount of salt in the summer and decrease it in the winter
- 300ml of water
- 38g of salt
4
Place the flours into a large bowl, then hold your fingers down separately to imitate a few sets of chopsticks and mix the flour for a few minutes by swirling your ‘chopsticks’ around
- 540g of strong white flour, plus extra for dusting
- 60g of tapioca flour
5
Gradually pour in around a quarter of the water as you mix the flour with your fingers. The flour should become moist as you do this but not stick together or form a dough
6
Continue to add the water as you mix, making sure the flour is mixed throughout and maintains a damp sandy texture rather than a lumpy dough. If an area of the flour sticks together, try to loosen it by mixing that bit in particular with your finger ‘chopsticks’ before adding more water. Note that in the summer you might need less water and in the winter a bit more, as the heat makes the dough softer
7
Press together the dough and fold (without kneading) to form a ball, making sure you pick up any bits of dough that have stuck to the bowl as well. Place the dough in a large, sealable plastic bag
8
Flatten the dough with your feet until it is large enough to stand on, then step back and forth, changing the angle from time to time, for 5 minutes
9
Take the dough out of the bag, roll it up into a cylinder, then place it back in the bag and rest it in the fridge for 30 minutes
10
Repeat the stepping, rolling and resting process twice more, then step on the dough one more time to flatten it into an oval shape. Place the dough onto a clean work surface
11
Fold the edges of the dough into the centre, then continue to knead the dough in this way to eventually form a ball with a concentrated fold at the centre (like a belly button). Roughly seal the belly button with your fingers, place the dough in the plastic bag smooth-side up and rest for about 1 hour in the summer or a few hours in the winter. This helps to mature the dough and give it extra bounce and chew
12
Step on the dough once more until it is about 1cm thick, then lightly flour a work surface and roll the dough a few times in each direction to even it out. Wrap the dough around the rolling pin, then apply pressure to it to make it thinner, around 2-3mm
13
Scatter more flour over the dough and fold the top third down and the bottom third up. Dust with more flour and cut the folded dough into 3mm ribbons. Grab the noodles and give them a good shake to loosen each individual ribbon
14
Bring a large pan (as big as you have) of water to the boil and cook the udon noodles for 10-15 minutes. There’s a high chance that the pot will overflow, so have a jug of cold water ready for when this happens
15
While the noodles cook, finish the dashi. Place the mirin in the microwave and cook for 1 minute to burn off the alcohol
- 12g of mirin
16
Mix the sugar into the mirin, then pour this mixture into the dashi along with the soy sauce and half the amount of salt. Gently bring the dashi to a simmer
- 15g of caster sugar
- 24g of usukuchi soy sauce, (Japanese light soy sauce)
- 10g of salt
17
Once the noodles are cooked, drain and wash or rinse in cold water until completely cold. At this point they can be served cold, or reheated by blanching in boiling water for 1 minute
18
Once the dashi is almost boiling, taste and see if you want to add the remaining salt
19
To serve, divide the blanched noodles between 4 bowls and pour the hot dashi over the top. Scatter with the spring onions and serve
- 1 bunch of spring onions, finely sliced, to garnish
Get in touch
Please sign in or register to send a comment to Great British Chefs.
You may also like
Load more
NAVIGATE


© Great British Chefs 2026